In this scenario we have no connection between two components and we want to implement EventEmitters via two different components. If you have parent/child scenario you can use @Input, @Output system of angular (explained in other places).
In Angular, communication between components is crucial for building dynamic and interactive applications. While the parent-child relationship establishes a natural channel for event propagation, scenarios often arise where components on equal footing need to interact. Fear not, for the versatile EventEmitter comes to the rescue! This article unlocks the secrets of using EventEmitters to enable communication between siblings or unrelated components, empowering you to create seamless user experiences even in complex application structures.
The Power of EventEmitters
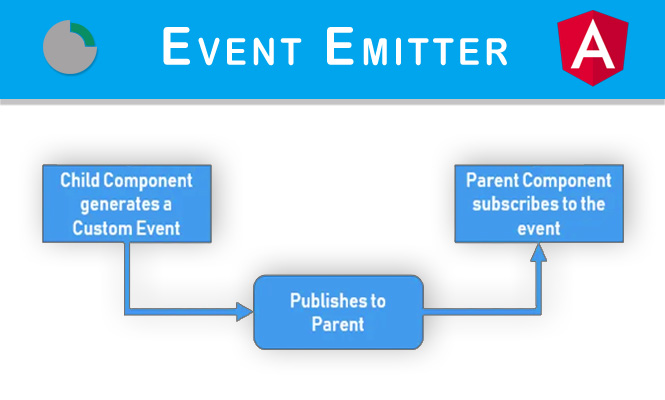
EventEmitters serves as a communication bridge between components. It allows a component to emit an event, carrying data if needed, and other components can subscribe to this event to react accordingly. This decoupled approach eliminates tight coupling between components, enhancing maintainability and testability.
Scenarios demanding non-parent-child communication
Several use cases necessitate communication beyond the parent-child hierarchy:
- Shared functionality: Components responsible for independent tasks might need to notify each other of changes or trigger actions in response to user interactions.
- Global events: Application-wide events, like user authentication or language changes, necessitate informing multiple components across different sections.
- Dynamic components: When components don’t have a predefined relationship, using EventEmitters offers a flexible solution for data exchange.
The ingredients for our EventEmitters and components
The ingredients for our recipe are:
- 1 EventEmitter
- 1 service
- 2 components
We can start adding a service with, inside it, an event emitter.
Sign-in service 💾
// ~/sign-in.service.ts
import { EventEmitter, Injectable } from '@angular/core';

@Injectable()
export class SignInService {
  public username = new EventEmitter<string>();

  constructor() { }

}
Now we create our example components to use it.
Header component 💾
// ~/header.component.ts
import { Component, OnInit } from '@angular/core';
import { SignInService } from '../sign-in.service';

@Component({
  selector: 'app-header',
  template: `<header>
              Hello<span *ngIf="username">{{' ' + username}}</span>!
            </header>`,
  styleUrls: ['./header.component.css']
})
export class HeaderComponent implements OnInit {
  public username;

  constructor(private _signInService: SignInService) {
    this._signInService.username.subscribe(
      (data: string) => {
          this.username = data;
    });
  }

  ngOnInit() {
  }

  ngOnDestroy() {
    this._signInService.username.unsubscribe();
  }
}
With its style:
/* ~/header.component.css */
header {
  box-sizing: border-box;
  height: 60px;
  width: 100%;
  background-color: #1389fd;
  color: white;
  position: absolute;
  top: 0;
  right: 0;
  left: 0;
  line-height: 40px;
  padding: 10px 10%;
  font-family: Lato;
  font-size: 24px;
  text-align: right;
}
Sign-in component 💾
// ~/sign-in.component.ts
import { Component, OnInit } from '@angular/core';
import { NgForm } from '@angular/forms';
import { SignInService } from '../sign-in.service';

@Component({
  selector: 'app-sign-in',
  templateUrl: './sign-in.component.html',
  styleUrls: ['./sign-in.component.css']
})
export class SignInComponent implements OnInit {

  public username: string;

  constructor(private _signInService: SignInService) {}

  public handleSubmit(f: NgForm): void {
    console.log(this.username);
    this._signInService.username.emit(this.username);
  }

  ngOnInit() {}
}
With its template and style:
<!-- ~/sign-in.component.html -->
<form #f="ngForm" (ngSubmit)="handleSubmit(f)">
  <!-- username field -->
  <label for="username">Username: </label>
  <input #usr="ngModel" id="username" name="username"
        [(ngModel)]="username" class="form-control" required  minlength="3">

  <!-- submit button -->
  <button type="submit" class="btn btn-primary">SEND</button>
</form>
/* ~/sign-in.component.css */
form {
  box-sizing: border-box;
  background-color: white;
  color: black;
  padding: 10px 10%;
  font-family: Lato;
  font-size: 18px;
  text-align: center;
}
Now, when we click on submit Send button we can see our username inserted in the header component.
Additional Considerations
- Multiple Subscriptions: A single event can have multiple subscribers, enabling various components to react accordingly.
- Data Sharing: Events can carry data in their payload, facilitating information exchange between components.
- Unsubscribing: Always unsubscribe from events when components are destroyed to avoid memory leaks.
Beyond the Basics:
- Explore dedicated libraries like ngx-PubSub for advanced event management features.
- Consider using BehaviorSubjects or ReplaySubjects for scenarios where the latest emitted data needs to be available to new subscribers.
- Remember that EventEmitters are not a replacement for well-structured application architecture. Use them judiciously for targeted communication, avoiding excessive event-driven complexities.
Conclusion EventEmitters between components
By harnessing the power of EventEmitters, you can break free from the constraints of parent-child relationships and establish flexible communication channels between any components in your Angular application. Embrace this powerful tool to create dynamic and responsive user experiences, ensuring your application excels in its interconnectedness.
An example
Here you can see a working example:
Try it at home!
Like!! I blog frequently and I really thank you for your content. The article has truly peaked my interest.