One of the best features of Drupal is the module system, which allows its extreme modularity and versatility on any occasion.
This has allowed over the years the creation of hundreds of modules by groups of developers who carried out only once the basic tasks for the creation and maintenance of a large portal. In fact, one of the first things you do as soon as you set up a portal is to search the Drupal site for all the modules that the basic installation does not make available.
What we will see today is instead how to create our own custom module. In our case this module will then include its own pages, in our case a Homepage and an About page.
First of all we create a new folder to include all those that will be our custom modules, the following:
/sites/all/modules/customOnce created we will package the module, with another directory that we will call for example “common”.
Below that we create the two basic components for the existence of a module:
* .info(in our example therefore: common.info)* .module(in our example therefore: common.module)
where the asterisk must be replaced with the name we would like to give to the module.
*.info
name = Common
description = generic pages
core = 7.x
package = Custom

dependencies[] = core
In this file we will put the general information of our module: the name, the group of modules to which this module belongs (for example we could put it within the group of our custom modules), the various dependencies.
All this by formatting it as a properties file (the typical key / value formatting).
*.module
<?php

/**
 * @file
 * Code for the generic pages.
 */

/**
 * Implements hook_menu().
 */
function common_menu() {
    $items['home'] = [
        'title' => 'Home',
        'menu_name' => 'main-menu',
        'access arguments' => ['access content'],
        'file' => 'pages/home.page.inc',
        'page callback' => 'home_page',
        'type' => MENU_IS_ROOT || MENU_NORMAL_ITEM,
        'weight' => -6,
    ];
    $items['about'] = [
        'title' => 'About us',
        'menu_name' => 'main-menu',
        'access arguments' => ['access content'],
        'file' => 'pages/about.page.inc',
        'page callback' => 'about_page',
        'type' => MENU_NORMAL_ITEM,
        'weight' => -1,
    ];

    return $items;
}
Inside this file we are going to insert a hook function that will be taken inside the module to establish which paths within the portal must be reachable. In our case, therefore, the array to be exported must contain the home and about objects. For each of these objects:
'title'sets the title of the page.'menu_name'establishes the group of pages in which this one we are creating should be included.'access arguments'establishes the type of access allowed to this page (in our case access will be allowed to anyone who can access the contents of the portal).'file'determines where to get the page content.'page callback'pairs with ‘file’ and defines the function to be used within the file.'type'are flags that determine the type of page. For example the home page is a root page.'weight'determines the order in which the page should be found.
After creating the array don’t forget to export it, with a nice return $items;, to make all the page configuration work nothing.
*.inc
To create the actual content of our page we create a third file inside the pages directory. This file will have the name and extension: home.page.inc (as defined in common.module). The *.inc extension is used to tell Drupal and other developers that that file is for inclusion of functions or other. Inside the file we create the home_page() function which will be our page callback.
<?php

/**
 * Page callback for home page.
 */
function home_page() {
  $build['desc'] = [
    '#theme' => 'html_tag',
    '#tag' => 'p',
    '#value' => 'Hello! I\'m an home page.',
  ];

  return $build;
}
Module activation
Once all the “development” part of our module is done, we take care of its activation. This can be done within the Drupal administration interface.
Without this activation the module will not be registered within Drupal and its functions (in our case its pages) will not be visible and reachable.

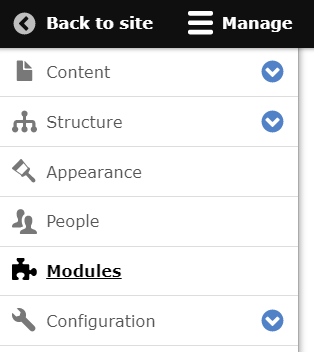
Inside the interface we access the “Modules” section and we will find ourselves in front of a long list of modules.
We look for our module in this list, which will initially be unchecked. We check it and scroll down until we find the “Save configuration” button.

Once done we should have activated the module and therefore the pages we have created within it should be visible.
That’s all for today.
